 |
|||||||||
|
|
||||||||||||||||||
|
|
| Want to leave us a comment about the site or in general? Click here to access the form. |
 |
|
The making of 'Afrika Korps' cinematics by: Tamas Varga Added on: Mon May 24 2004 |
|
| Page: 1 2 3 4 5 6 7 8 9 | |
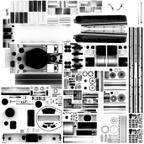
We relied on bitmap textures for almost every model, created with a combination of processing digital photos and manual painting. There was, however, a 'procedural' layer too, as we baked ambient occlusion maps for each model. This requires that there is no overlapping in the UV maps; or you can use a second UV set for the occlusion map that can be generated using automatic mapping. We do not recommend this though, because we've found that the rough occlusion maps have to be manually processed for proper results. There are some small artifacts that should be erased, and it's a good idea to blur out the sharp edges - the Burn tool in Photoshop is particularly useful as it can grow the shadow edges a bit as well.
To generate the occlusion map, your application has to support some sort of Global Illumination and texture baking. Assign a fully white material to your object, light it with a white skylight, turn on GI and bake the results to the UV map.
|
Best viewed in 1024x768 or higher,
using any modern CSS compliant browser.

