 |
|||||||||
|
|
||||||||||||||||||
|
|
| Want to leave us a comment about the site or in general? Click here to access the form. |
 |
|
"The Labyrinth" by: Ben Procter Added on: Sat Aug 12 2000 |
|
| Page: 1 2 3 4 5 | |
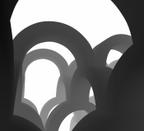
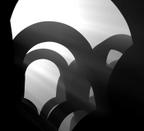
Atmosphere My Greek background had lots of summer haze in it, so adding atmosphere to my 3D was critical for getting a match. First I did a simple fog pass which would allow for blue fading with distance (Figure 11). But I also wanted to make my afternoon sun almost tangible, so I did an additional pass with actual shadowed volumetrics from my primary sun spotlight (Figure 12). To be honest I don't remember exactly which volume techniques I used, but it took trying it a few different ways and combining them in Photoshop to get the effect I wanted. Not a very elegant approach, but I have limited patience when tweaking parameters on very slow shaders such as the raymarching ones necessary for perfect 3D volumetrics. "We'll fix it in post."   Figure.11 and Figure.12 Compositing The idea of rendering everything in passes was that at the end I could tweak each element of the scene, and the relationships between them, in Photoshop. I haven't tried the new "interactive rendering" features in Softimage XSI and other apps, but I must assume that you can get much of the same realtime control by combining passes in Photoshop, AfterEffects, or another compositing package. Due to a flaw in my reconstruction of how the mental ray renderer puts things together, I ended up forced to blend a single pass render into my composite to get some of the shading subtlety back that I had seen in my test renders. (I hope to master the compositing of render passes better in the future to avoid such unanticipated fallbacks.) However, the multipass approach did garner many benefits, which will become apparent as I explain how I put my final image together. The best way to grasp how the render passes all fit together is to download  Having the lights separated let me tweak the relative intensities of the light sources and desaturate the sky light color a bit for a subtler look. I was also able to compensate for the sky light pass' lack of shadowing by masking it with a gradient layer mask which diminishes its intensity on the lower arches. One component of the fill lighting not mentioned earlier was an ambient light layer, also set to "screen", which I didn't need to render because it was applied evenly to everything just like the ambient light value in a single pass render. The main goal in combining the light passes was to match the colors seen in the Mediterranean background plate and to make sure that the fill lighting had just enough presence to make the shaded areas of the image interesting without diminishing the perceived strength of the primary sunlight. Above the light layers is the texture pass, set to the "multiply" mode. By keeping the texture color information in its own layer, I was able to play with its contrast, all the while seeing how it interacted with the light passes. Also I went in and retouched out some of the most glaring texture repetitions, without touching the lighting. Even after this retouching my image has a lot of fairly obvious texture repeats, but hopefully the overall composition and lighting are compelling enough to distract from such a detail-level flaw. |
Best viewed in 1024x768 or higher,
using any modern CSS compliant browser.