|
|
 |
|
Procedural Shaders: Update on Lava Added on: Sat Dec 14 2002 |
| Page: 1 2 3 4 5 6 |
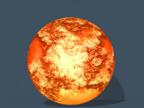
Apply the lava material to the sphere and render it to take a look, looks lava�ish right? Cool, lets go on.

What we want to do now is make a blend material and blend the two shaders together, and then make a mask to control how they blend together. Luckily we�ve already made the mask� The mask controls where the lava and the rock go, white bits of the mask place the lava inside of them, and the rock inside the black bits. So we�ve already made the bump map (the electric one) which we made as a bump map to give the mask a bit of elevation. So now go to a new material altogether, name it �Rock/Lava Shader� this will be the actual material we�re making now, so lets get ready.

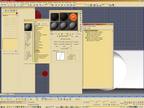
Make this new material a blend material by clicking on the standard button to the right. Once you�ve chosen the blend material a window will pop up asking you whether to keep the previous material or discard it. Choose discard since we want to put the two materials we�ve already made into the blend material.
So now click and drag the rock material onto the Material #1 slot, and then choose �instance� from the pop up window, so if we later want to make changes it will effect both the blend material�s Rock Shader and the separate one. Drag the lava shader onto Material #2 and choose instance again. Lastly click on the blend material�s mask slot and when the material navigator window pops up click on the mtl editor checkbox under �browse from� to the top right of the map navigator window.

Click on the electric bump map material we made for the lava shader. Choose instance, the bump map now is being used for the mask to blend the rock and lava together. (in practice its� better to make the blend material mask first and then later copy it into the bump slot, but it�s easier and less confusing to explain this way for the time being. But all this bump map is doing is giving elevation to the mask so it pushes up a bit and doesn�t look as flat.
|
 |
|
|


