|
|
 |
|
Compositing: Camera Matching Added on: Tue Sep 19 2000 |
| Page: 1 2 3 |
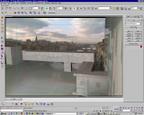
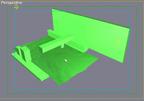
So first of all begin to build the bridge and then the buildings next to either side of the river, if you notice they don't match up correctly then adjust the camera and the camera target until they begin to. Eventually it should begin to look more like below.

Eventually it should grow to become more accurate, but essentially this method is more trial and error, create the geometry and tweak it, as more geometry is created for the scene you begin to get a better idea about the cameras position, rotation and other things like that.
Below is another image which has advanced just a bit more with more geometry ect.

But after a lot of testing and tweaking you should eventually get a camera which is accurate to the original position and lense of the camera that took the photo, from there you can begin to build more detailed geometry for the 3D scene.
Once you're satisfied with how things are, go to the material editor and load up a new material, first of all we are going to make the background, so go to the bitmap properties and select the plate as the background, change it to enviromental mapping and choose screen. Name this material "Screen Plate" and then drag this material into another material slot and change the name of it to local plate, then go to the mapping and change it back to texture mapping.
Now go to the enviroment panel under the render menu and set up the background, once you've done that select all of your geometry and assign the local plate to them. Now individually go to all of the objects and in the modify panel assign the camera map modifer to each of them, and then click on the pick camera button and select the camera.
What this does is allow you to automatically texture map your goemetry based on the texture based on where it is in the cameras view, and since we have matched the geometry up identical to the photo it should map perfectly on.
From here you can successfully deform various objects in the scene meaning you can blow shit up or do whatever you want. From here if you want, you can select the bridge, hit the testilate button in the modify panel and adjust the iterations to give it detail from which you can then begin to break it up or do what you will.

|
 |
|
|


