|
|
 |
|
Realistic head with NURMS Added on: Sun Sep 03 2000 |
| Page: 1 2 3 4 |
Go into "Polygon" mode and select the face. One thing I find that helps, is if you turn on "Shade Selected Face" under Viewport Configuration. Delete the stranded face. The reason for doing this is, you want NURMS to sub-divide the faces evenly, so a face needs to be created as a four-sided poly.
Use a three-sided poly as little as possible. You may have to use a couple at the corner of the mouth, around the nose area, and connecting the ear. Other than that, you will want to use four-sided polys.

Now, basically you just start pulling vertices around until you get a good shape going of the mouth area. You will more than likely have to create and delete polys to get a better shape.
To do that, you can grab a vertex, copy, and move it to where you need. Whenever you copy a vertex though, a dialog box comes up, makes sure that "Clone to Element" is checked.
After you have a few vertices made, go to "Polygon" mode and create four sided polys. Also, keep in mind while creating the head that you want to set it up like muscles build your face. This will make it easier to deform the mesh when it comes time to setup morph targets for facial animation.

I built my head with the mouth open so that I could build the inside of the mouth and teeth later. What you want to do now is, back out of Sub-Object mode and create a mirror of the mouth area. Create it as an instance. This will save you time on modeling and ensure that both sides of the head are symmetrical.
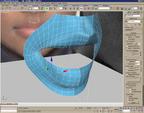
Now, add a "Mesh Smooth" modifier to the original geometry you were modifying. (NOTE: The "Mesh Smooth" modifier MUST always remain at the TOP of the stack.) You will see your low poly mesh now turn into a high poly one. Notice how the polys are built around the mouth. I created it that way because that is how muscles build your mouth, and when the face is animated, the mesh will deform properly.

|
 |
|
|


