|
|
 |
|
Realistic head with NURMS Added on: Sun Sep 03 2000 |
| Page: 1 2 3 4 |
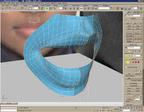
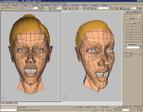
Go back down in the stack to your �Edit Mesh� modifier and go in Vertex Sub-Object mode. Your high poly mesh will turn back into a low poly one. Turn on the "Show end result On/Off Toggle" button.
 You should now see your low poly mesh turn into a high poly one. Notice the range "hulls" or "cage" around the geometry. That represents the low poly geometry. Grab a vertex and move it around. Watch the high poly geometry update! You should now see your low poly mesh turn into a high poly one. Notice the range "hulls" or "cage" around the geometry. That represents the low poly geometry. Grab a vertex and move it around. Watch the high poly geometry update!
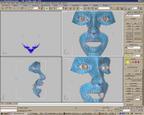
After I am pretty satisfied with the mouth area, I move up to the nose and around into the eye.
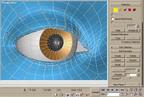
When you get to the eye, be sure to use a sphere as a frame or reference to build around. I already have a default eye I made a while back that I just imported and put in there for placement.
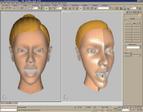
There�s not much more to it than that. After you are done, attach the two together and weld the middle vertices. It just takes a little patience and in no time you will have a fully modeled head ready to animate!
|
|
|


