Using the snapshot toolSelect you track_part, clone it as a copy and add a path constraint to it using the track spline, then open up the snapshot tool under the Tools menu, set it to Range, enter a value and hit OK. So you'll end up with either to many of to few track_parts. I ended up using 34, easy enough! Now lets move on. 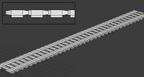
Next, we need to work with the grid, so scale your track_part down or up to fit evenly to a grid spacing. Now you can duplicate it the amount of times you've established earlier (mine was 34 times), try get it to line up nicely to the grid!! 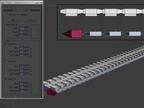
Now lets create some bones. First turn on your grid snap, go to your left view and start creating your bones under the duplicated track_parts, yes go all the way to the end, and leave the extra little bone it creates at the end (for me 34 track_parts and 35 bones). Here I changed the first bone to that red color, and the last lil one to orange. 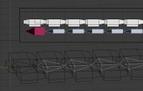
We're getting there, now we link each track_part to the bone directly underneath it. (be sure to link from the track_part to the bone, and not from the bone to the track_part, it will break the bone chain) quick check that all is linked, double click on the red one and move it, all the track_parts should move with the bones!
|


