|
|
 |
|
"I, Robot" Added on: Fri Nov 17 2000 |
| Page: 1 2 3 4 5 6 7 8 |
The Body
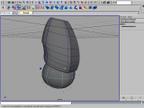
Create a nurbs cylinder and start pushing and pulling those cv's, this is going to be the upper part of the torso so I made it look like a ribcage. Because the head combines smooth curves with hard corners I want this to be the case for the other body parts as well. Therefore I extracted the vertically running isopharms by duplicating these
surface curves.
Throw away the original surface and rebuild it by using the curves that are left behind. By partially rebuilding it and then later combining the individual surfaces you get a nice combination of sharp corners in a smooth surface.
So basically loft the curves into two smooth side planes and make two separate lofts with only two curves to close the backside and the front side. Then Attach the surfaces using the "attach surfaces" tool from the "edit surface" menu, select the "blend" option to create a smoothed edge between the two surfaces.
For the hips I used a sphere, tweaked it, extracted its vertical isopharms and rebuild it again, same story basically.

To create the joints that stick out of the torso, first project circular shapes onto the sides of the ribcage and the hips and trim these out. Then extract the trim edges by duplicating these surface curves several times (about 10 curves per joint should be enough), move each curve further away from the torso and loft these curves into
the new joint shape, and once again start tweaking the cv's to get the shape you want.
Limbs
Once again primitives. For the upper arm and leg attach a nurbs cylinder (after tweaking it) to a nurbs sphere (I only tweaked the shoulder sphere heavily). To do this properly make sure that the cylinder and sphere are properly aligned and that both have the same amount of sections, select a horizontal isopharm somewhere near the bottom of the
sphere and detach the surface. throw away the bottom part and select both surfaces.
Now attach them, select "attach surfaces" from the "edit surface" menu and choose "blend" from the options menu.
|
 |
|
|

