|
|
 |
|
An Industry Lesson Added on: Sat Dec 14 2002 |
| Page: 1 2 3 4 5 6 7 8 |
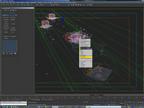
With the last boulder we want it to crash into the ground and shatter into fairly large chunks. So create a new parray particle system, click on the pick emitter button and choose the last rock.
Under viewport display choose mesh so we can see the mesh chunks when we get to that stage. Tell it to start emitting at frame 79 and give it a life value of 50. Adjust the speed to 0 since we're going to use spacewarps to control the velocity. Under particle types choose object fragments and go down to object fragment controls and click on the number of chunks checkbox and type 25 value in as the minimum.
Now go down to spin time under rotation and collision and change the value to 40 so it the chunks rotate when the rock breaks. Lastly when the rock falls, the particles are using motion inheirtince to multiply the velocity base on the objects velocity vector. So we need to adjust the object motion inheritence value to 0 so it doesn't do that. This way the rock will just emit oposed to emit based on the objects velocity's direction.

Apply the udeflector to it so it collides with the ground. And then create a wind spacewarp in the center of it, move it down a bit so the majority of the particles shoot more upward. Make it spherical and adjust the strength value to .3 and the decay value to 0.05. Create another wind above it but make it planar and pointing down. Give this one a strength of 0.3 and a decay of 0.03. Bind them and this should make the particles break and spread and the gravity vector push the particles down.

At this stage you may notice that when the particles break, the mesh is still there, we need to animate the visibility of the rock so at the frame the particle fragments appear the mesh disapears. So go to frame 79 and click on the mesh object of the rock, hit the animate button and then right click on the object and go to properties. Click on the up arrow next to the visibility value so it sets a keyframe at 1.0. (if you just type in the value it will ignore it since it see's that vaue is already put in, but not as a keyframe). So now click on okay and go to frame 80 and go back into properties and change the value to 0.0. Now this mesh will disapear and let the particles take over. Now in the trackview or your little track bar delete the keyframe on frame 0 that it created. It did this since when you first made the visiblity track have a value of 1.0. It created a value at frame 0 so it animates up to there, we don't want this value.
|
 |
|
|


