 |
|||||||||
|
|
||||||||||||||||||
|
|
| Want to leave us a comment about the site or in general? Click here to access the form. |
 |
|
Methods to hide mesh seams in realtime engines by: Se�n Forsyth Added on: Sat Jul 03 2004 |
|
| Page: 1 2 3 4 5 6 7 8 | |
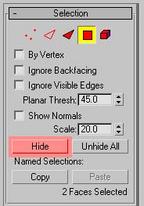
What this little tool now does in effect is the same as applying an edit normal modifier to the original mesh, selecting a vertex (they'll all be done in turn), hitting Copy, and then applying an Edit Normal modifier to the other base meshes, selecting the nearest vertex to the original (which, if we haven't changed locations of anything will still be correct), and applying a Paste to that - effectively taking the normal from the original mesh and pasting that normal to each vertex of our other new meshes, aligning the normals up perfectly. It takes a little while, but the effort involved in it is minimal, and you can basically leave it running (if it's a large mesh, I'd recommend leaving it run overnight). The beauty of this is that if there are problems on individual meshes, or you change things later on, you don't have to redo each of your cut up meshes, only those that have problems - not that you should have any problems anyway. You will probably have to collapse your stack after using this before you export, and as this tutorial is aimed at Max 6.0 users, it's worth noting that you will have to get the 6.1 update (Service Pack 1), available at the discreet website, in order to fix the bug in 6.0 which reset the normals when the stack was collapsed. You have been warned. Method 2: Not deleting faces in order to keep the normals The other method available we can use is to trick Max into not going near the normals. This can be done by simply by not deleting any faces which would affect the normals of the vertices at the seams. If we just hide the faces instead, those normals are kept intact.
Click on image to view larger So, rather than detach one set of faces from our original mesh, what we are going to do is create a duplicate mesh, and when we cut our two meshes up, this time we will keep one set of overlapping faces on each side of our two meshes (obviously only where they overlap and not on edges where the two don't meet). |
Best viewed in 1024x768 or higher,
using any modern CSS compliant browser.
