 |
|||||||||
|
|
||||||||||||||||||
|
|
| Want to leave us a comment about the site or in general? Click here to access the form. |
 |
|
Methods to hide mesh seams in realtime engines by: Se�n Forsyth Added on: Sat Jul 03 2004 |
|
| Page: 1 2 3 4 5 6 7 8 | |
If the entire scene is one large mesh this becomes difficult, so one of the many optimisations usually performed is to cut your scene up into seperate objects. This means that the camera now only draws what it sees in front of it, rather than the entire scene. One problem associated with cutting up irregularly shaped large open meshes, is that seams appear between the now seperate pieces. There are a few ways to hide these seams, and that's what I'll be looking at in this tutorial. I am a 3DS Max user, so this tutorial will be using that (ver 6 to be precise, but I imagine some of the same applies to previous versions), I'm not sure how other applications handle vertex normals, but I suspect it's similiar. As you can see in the image below, if you detach faces from a mesh, you are left with a visible seam. In this tutorial, we will be hiding this seam (as seen on the mesh on the left).
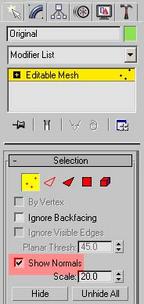
Click the image to view it larger The theory behind it goes like this: just as every face has normals, so does every vertex. You can view these in Max by simply turning them on. To do this, go into sub-object mode, select some vertices, and turn on Show Normals in the Selection roll up.
Click the image to view it larger |
Best viewed in 1024x768 or higher,
using any modern CSS compliant browser.

