|
|
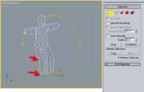
After all these steps you have got a mesh like the image below and now move the vertex to create the proper position.
Go to cut modifier and increase the face of the head, to use the cut you have to click and drag a line through the face and then click again, after move the vertex to create the base part of the face.
 
Apply the mesh smooth to the object and go to the local control/sub-object level, choose the segment of extremities and increase the �crease� to 1.
Repeat this command and the previous one to increase the detail of the snowboarder.
  
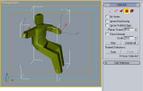
Go to the colour of the object and choose a dark one, so when you active the edged faces you can easily see the faces of the object.
 
|
|
|


